Going Medieval Map Seeds: How to Evaluate, Reroll, and Pick a Strong Start
A map seed in Going Medieval is the single number or short string that decides your starting biome, terrain shape, water layout, soil fertility, and the rough position of stone and ore deposits. Enter the same seed twice and you get the same map — which is why sharing seeds matters less than learning what to look for once the world is generated. This page is a practical evaluation framework: how the seed input behaves, which terrain features actually matter for survival, and how to reroll quickly when a seed falls short.
How the Seed Input Works
The seed field sits on the new-game creation screen. You can leave it blank for a fully random world, or type any value to lock the generation. Numerical seeds are the most reliable — short alphabetic strings are accepted by the current version but the engine still treats them as deterministic input. Whatever you type is read once at world creation and never re-rolled mid-playthrough, so changing the seed only works on a fresh colony.
Three seed behaviours are worth keeping in mind. First, the same seed on different biome choices produces a different shape, because biome is a separate input that constrains the generator. Second, version updates can change the procedural rules, which means a seed shared before a major patch will not always match a seed shared after it. Third, mods that touch world generation override the seed entirely — they read the input but apply their own rules on top.
Eight Criteria That Decide Whether a Seed Is Worth Keeping
Instead of memorising seed strings, learn the eight criteria below. Spend the first five in-game minutes scanning for them on the world map; if more than two are missing or borderline, reroll. Each row in the table below is a qualitative rule you can check by eye, not a hidden statistic.
| Criterion | What to look for | Quick eyeball test | Reroll if… |
|---|---|---|---|
| Flat buildable land | A continuous flat or near-flat patch | You can place a 20×20 wall ring without terraforming | The only flat strip is split by a river or cliff |
| Fresh water access | A river, stream, or lake within walking distance | A settler can reach water in well under a day | You are spawning in a dry inland pocket |
| Fertile soil | Soil tiles near the starting tile, not just in distant valleys | Several green-tinted soil clusters visible on first zoom-out | All visible soil is shallow or rocky |
| Stone proximity | A surface stone node or compact stone deposit near the start | You can see stone nodes from the starting tile | Stone is only deep underground and far away |
| Ore proximity | At least one iron or copper node within early-game reach | An ore tint is visible on the map edge or near stone | No ore tint anywhere on screen at first zoom-out |
| Wood availability | A tree cluster, not isolated single trees | You can mark 30+ trees without leaving the starting region | Trees are scattered one-by-one across a wide plain |
| Natural defense | Elevation, cliffs, or water forming a partial barrier | At least one map edge looks hard to walk through | You are standing on a pancake-flat open plain in every direction |
| Expansion room | Space beyond the immediate base for later castle growth | You can imagine a 40×40 footprint without hitting the map edge | The map edge is within one screen of the start |
Priority Mix by Playstyle
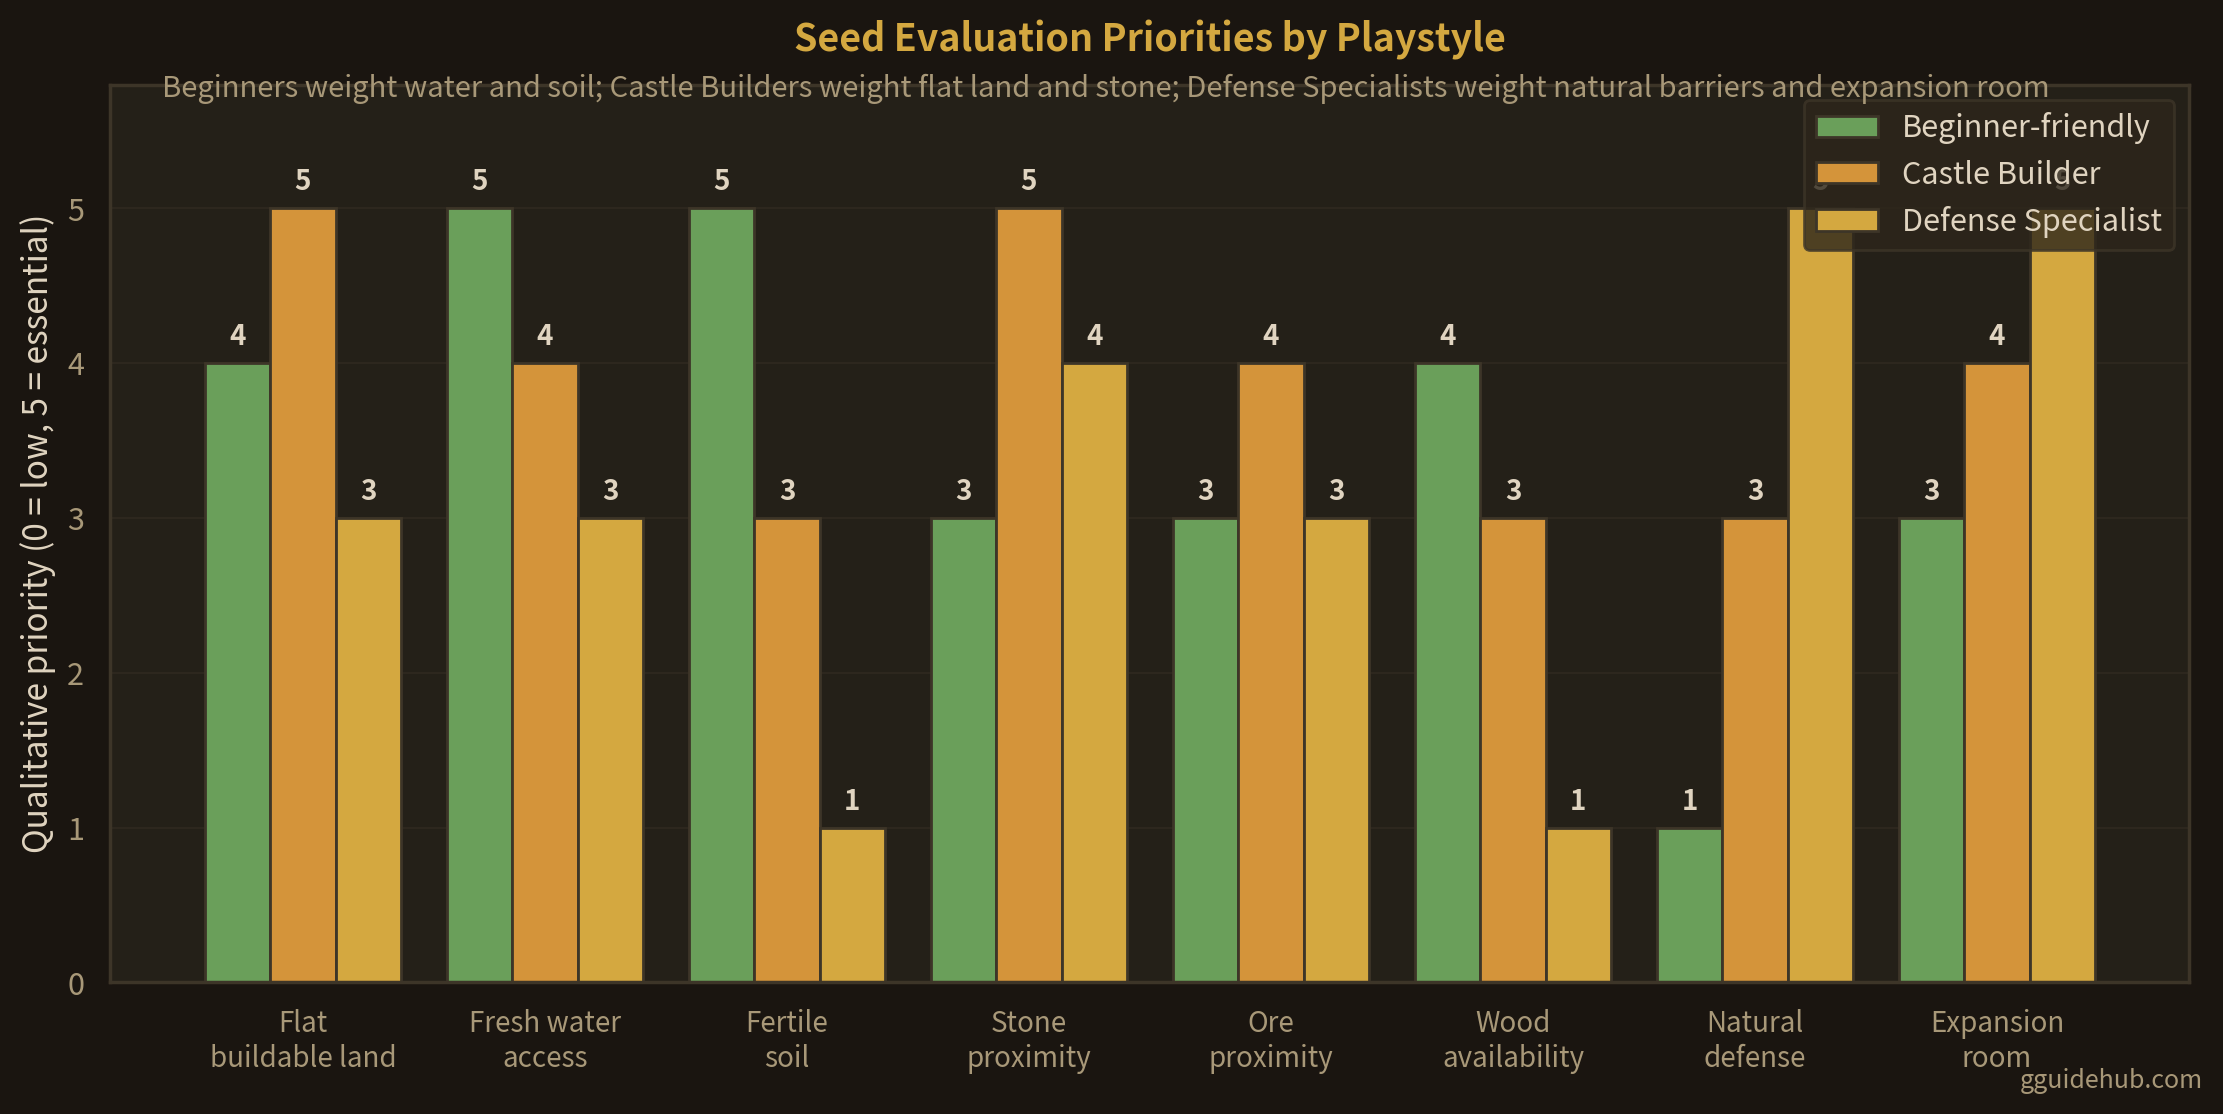
The eight criteria are not equally important to every player. A beginner values water and soil because early starvation is the most common loss; a castle builder cares first about flat land and stone because the whole plan is a permanent stone footprint; a defense-focused player will reroll anything that does not give a natural chokepoint or elevation on at least two sides. The weighting below is a starting point — adjust it to match what your colony actually struggles with.
| Criterion | Beginner-friendly weight | Castle builder weight | Defense specialist weight |
|---|---|---|---|
| Flat buildable land | High | Essential | Medium |
| Fresh water access | Essential | High | Medium |
| Fertile soil | Essential | Medium | Low |
| Stone proximity | Medium | Essential | High |
| Ore proximity | Medium | High | Medium |
| Wood availability | High | Medium | Low |
| Natural defense | Low | Medium | Essential |
| Expansion room | Medium | High | Essential |
Read the columns as a decision aid, not a score to add up. If two of your top-tier criteria fail on a generated map, reroll. If only one fails, you can usually design around it with early-game choices — a missing water source means digging wells faster; missing stone means buying it from a trade caravan until you find a node.
A Two-Minute Reroll Routine
On the world map, the seed has already decided everything before you click “Start.” Use these steps to decide quickly without committing to a slow colony.
- Zoom out fully and check the map edges for water, cliffs, and forest density.
- Pan across the centre to find the largest continuous flat patch — this becomes your base footprint.
- Trace the nearest river or lake back to the flat patch and count travel days in your head.
- Look for soil-coloured clusters near, not far from, the flat patch.
- Identify any surface stone node inside the flat patch or just beyond it.
- Check whether at least two of the eight criteria sit in your top weighting tier; if not, reroll.
The whole scan takes under two minutes once practised. Burning ten minutes rerolling up front almost always saves hours of being stuck in a bad map later — especially for first colonies, where an early food or stone shortage cascades into raid losses you cannot recover from.
Frequently Asked Questions
Are map seeds shareable between players?
Yes, as long as both players use the same game version, the same biome choice, and no world-altering mods. The seed field accepts numbers and short strings; whatever you type produces the same terrain on another machine with matching inputs.
Do seeds behave the same in multiplayer as in single-player?
The host’s seed is the seed everyone plays on. World generation runs once on the host before other players join, so all clients see identical terrain, water, and resource placement. If a client has a mod that changes generation, the maps will not match.
What is the fastest way to decide if a seed is bad?
Skip detailed reading and check the two criteria most likely to kill the colony: water access and stone proximity. If either is far from the starting flat patch, reroll immediately. Everything else can be worked around with time and trade.
Can I evaluate a seed before committing to the colony?
Yes — the world map is fully visible on the creation screen. Pan and zoom freely before clicking “Start.” Once you confirm, the seed is locked for the entire playthrough; there is no in-game way to regenerate terrain.
Do updated game versions invalidate old shared seeds?
Major patches sometimes change procedural rules, so a seed that was strong on an older version may look different on a newer one. Treat any shared seed as a starting point: run the two-minute reroll routine before committing.
Related Guides
Last updated: July 22, 2026