Going Medieval Killbox Design: Trap Corridors That Actually Work
A killbox is the single most efficient defensive structure in Going Medieval: a deliberately engineered path that forces raiders through a gauntlet of spike traps while your archers shoot them from positions of complete safety. Done well, a killbox lets a handful of settlers annihilate raids that would overwhelm an open-field defence, with zero injuries and minimal ammunition of time. Done poorly, raiders path around it, smash your perimeter walls, and your trap corridor becomes expensive decoration. This guide covers the four components every working killbox needs — funnel, trap corridor, embrasure firing line, and bait door — plus the weapon math that determines how many archers you actually need.
The Four Components of a Working Killbox
Every functional killbox in Going Medieval combines the same four elements. Miss any one of them and the design degrades: without a funnel, raiders arrive spread out; without traps, your archers carry the entire damage load; without embrasures or merlons, enemy archers trade shots back; without a bait door, raiders simply attack your walls instead of entering the corridor at all.
| Component | Purpose | Build Spec | Common Failure |
|---|---|---|---|
| Funnel walls | Gather raiders from any approach angle into the corridor mouth | Angled wall segments fanning 20–30 tiles out from the entrance | Gaps between funnel and terrain let raiders slip past |
| Trap corridor | Damage and thin the raid before contact | 1–2 tiles wide, 8–15 tiles long, spike traps on every floor tile | Too short — raiders cross before traps + arrows do enough work |
| Embrasure firing line | Let archers shoot into the corridor while protected | Embrasure or merlon segments every 2–3 wall tiles, one archer each | Archers standing on open ground get shot back or flanked |
| Bait door | Give raiders a valid pathing target so they commit to the corridor | One un-forbidden door at the corridor's inner end; all other doors forbidden during raids | All doors sealed — raiders switch to demolishing your walls |
Pathing Rule: Raiders take the shortest valid path to something they can attack or steal. "Valid" means reachable without breaking anything. A killbox exploits this: your trap corridor is the only reachable route, so the AI willingly walks into it. If you wall off your base completely, raiders stop pathing and start demolishing — which is why the bait door stays open until the last second.
Spike Traps: Placement and Re-Arming
Going Medieval's wooden spike trap is built from the defence menu and is available from the very first day — no research required, only wood. A trap triggers when an enemy walks onto its tile, dealing damage, and then sits inert until a settler re-arms it. Two design consequences follow. First, traps belong inside the corridor, never scattered around your perimeter: an isolated trap in a field might clip one raider, while the same trap inside a 1-tile channel is guaranteed a target. Second, depth beats width — because triggered traps go inert mid-raid, a long corridor with traps on every tile keeps dealing damage to the 5th, 10th, and 15th raider long after the first row has fired.
Keep your own settlers off the trap line. Mark corridor tiles as restricted (or simply never zone anything inside the corridor) so haulers and farmers don't wander across armed traps during daily work. After every raid, open the defence menu and check each trap's state — re-arming is a job like any other, and a colony that forgets it fields an empty corridor when the next raid arrives. For dedicated trap tactics, see our trap placement guide.
Budget Tip: Spike traps cost only wood, and wood is the one resource every map has in abundance. In year one, a 10-tile corridor of traps is cheaper than equipping a single additional archer with a longbow (40 wood) — and it works while your settlers sleep. Expand the corridor before you expand the garrison.
The Firing Line: Embrasures, Elevation, and Weapon Choice
Your archers' survival depends on cover. Embrasure wall segments (and merlons on elevated walkways) shield your marksmen from return fire while leaving them free to shoot into the corridor — the game's own defence tips call out merlons as cover for archers against enemy projectiles, and placing archers on higher ground grants a buff to precision, range, and critical hit chance. A raised walkway behind the embrasure wall combines both bonuses and should be your default mid-game upgrade.
Weapon choice determines how much corridor each raider survives. The table below uses the verified weapon stats from our archer vs crossbow comparison: Longbows deliver the highest sustained DPS and mulch unarmoured raiders, while crossbows trade fire rate for armour penetration and 25m range — letting them engage raiders at the funnel mouth, before they even enter the corridor.
| Weapon | Damage (Good) | Attack Duration | Sustained DPS | Max Range | Armour Pen. | Killbox Role |
|---|---|---|---|---|---|---|
| Short Bow | 12 | 5.4s | 2.22 | 18m | 80% | Day-one filler; arm every recruit |
| Longbow | 22 | 5.4s | 4.07 | 18m | 80% | Wave-clearing core vs. unarmoured raiders |
| Crossbow | 26 | 9.45s | 2.76 | 25m | 90% | Anti-armour; opens fire at the funnel mouth |
| Heavy Crossbow | 36 | 10.35s | 3.48 | 25m | 92% | Priority-target deletion (knights, shield-bearers) |
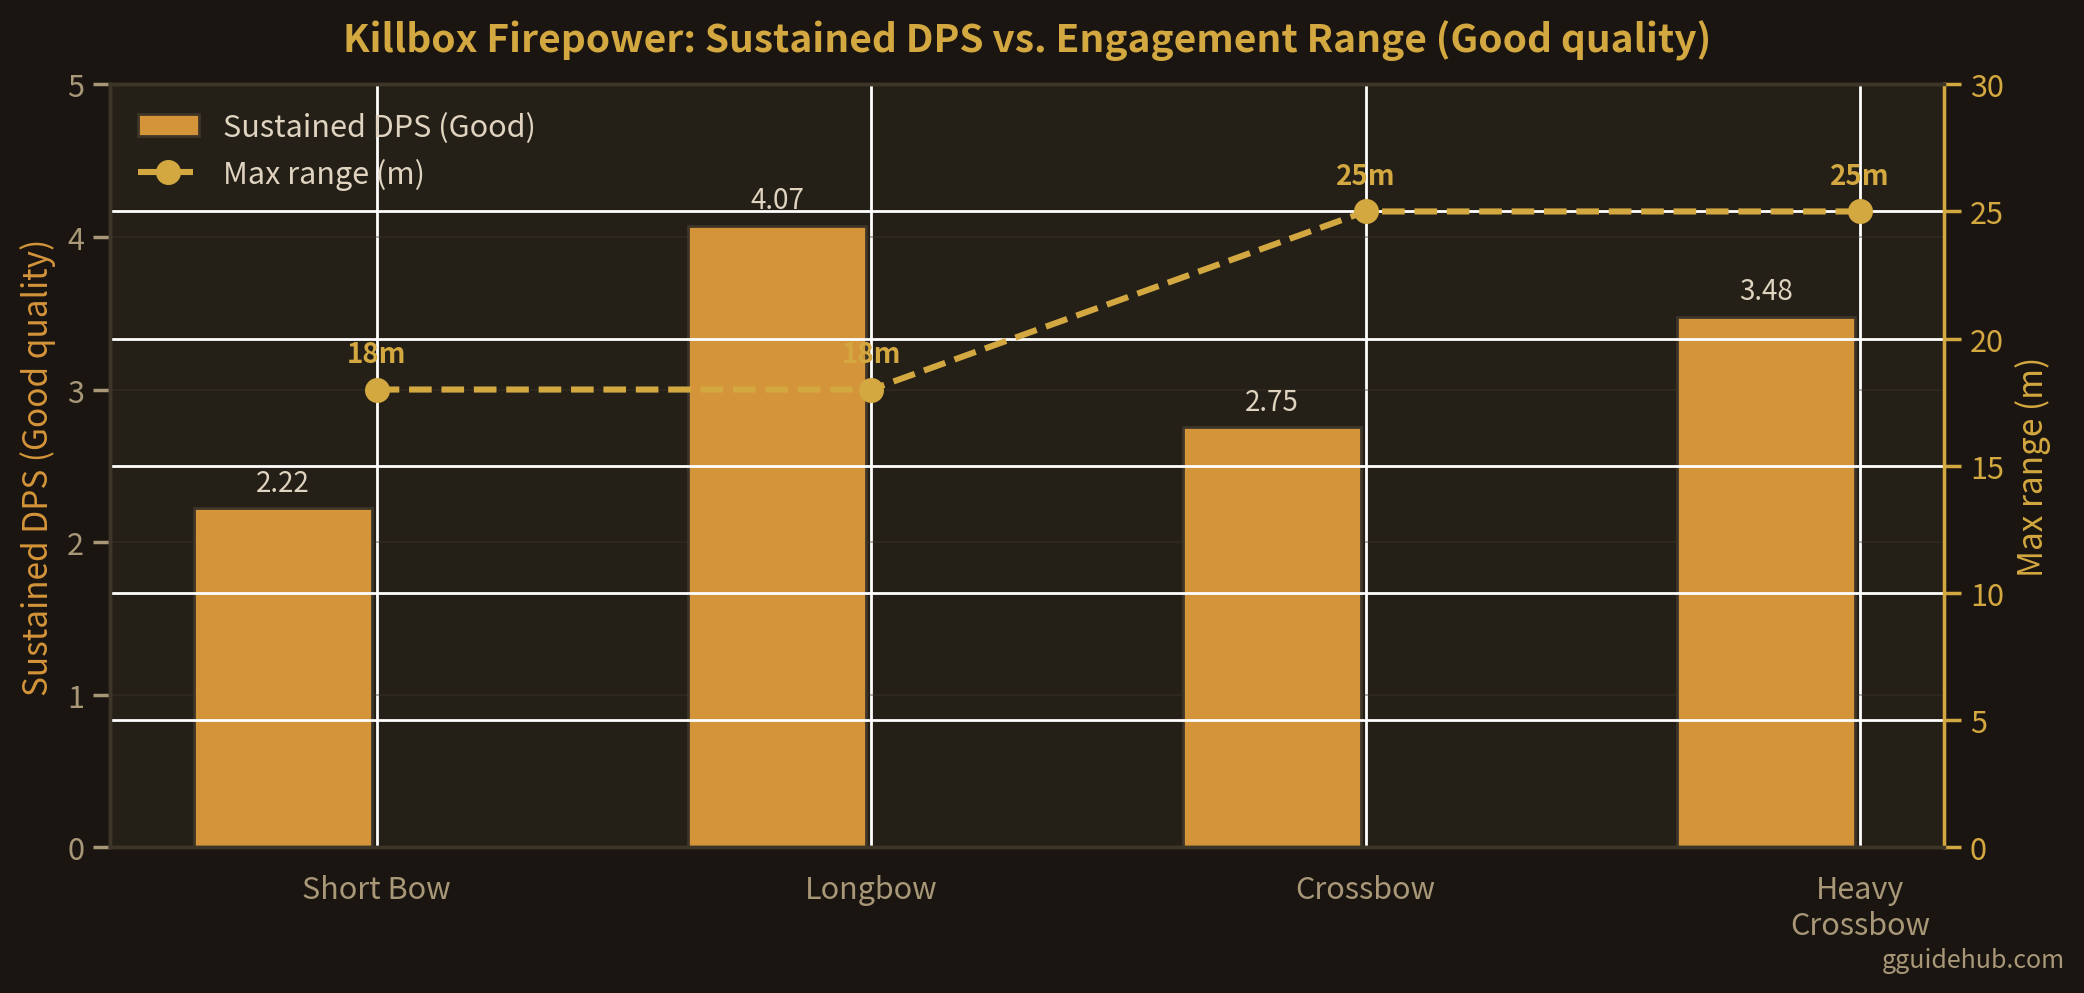
Practical staffing: three to four Longbow marksmen behind embrasures handle most year-one and year-two raids once traps have done their work. Add one Crossbow or Heavy Crossbow marksman per firing position as armoured raiders become common — their 90–92% armour penetration means plate armour barely reduces their impact, while a Longbow loses most of its 22 damage against the same target. Mix weapons per embrasure rather than segregating them, so every stretch of corridor gets both fast and heavy fire.
Example Killbox Layout (Top-Down View)
The classic funnel-and-corridor design: raiders are forced through a single trap-filled channel while your archers fire safely from behind an embrasure wall. A bait door at the far end gives raiders a pathing target so they commit to the corridor.
Scaling the Killbox as Raids Grow
Raid size in Going Medieval grows with your settlement's wealth and population — a prosperous colony attracts proportionally larger and better-armoured attacks (see our wealth scaling and raids guide). A killbox that trivialised year-one bandits will leak in year three unless you extend it. The progression below keeps the design ahead of the curve without rebuilding from scratch.
| Colony Stage | Corridor Length | Trap Rows | Firing Positions | Upgrade Priority |
|---|---|---|---|---|
| Year 1 (3–6 settlers) | 6–8 tiles | Single line, every tile | 2–3 (ground level) | Short Bows for everyone; funnel walls up |
| Year 2 (7–12 settlers) | 10–12 tiles | Full corridor floor coverage | 4–5 (add merlon walkway) | Longbows; forbidden side doors; bait door discipline |
| Year 3+ (13+ settlers) | 12–15+ tiles | Double-depth on approach half | 6+ (elevated tower behind) | Crossbows/Heavy Crossbows; stone walls; melee blocker at inner door |
The final late-game refinement is a melee blocker: one heavily armoured settler with a shield standing in the corridor's inner doorway. Anything that survives the traps and arrows arrives wounded and gets held in place by the blocker while the firing line finishes it. Keep a second door behind the blocker forbidden during peace so daily traffic never uses the corridor, and un-forbid it only if the line collapses and you need a retreat path.
Maintenance Checklist: After each raid — re-arm every triggered trap, repair embrasure segments damaged by enemy archers, haul raider corpses and loot out of the corridor (debris can obstruct the pathing that makes the bait door attractive), and re-forbid any door a settler opened during the fight. A killbox is a machine; it only works when reset.
Frequently Asked Questions
How wide should a killbox corridor be in Going Medieval?
One to two tiles wide. A 1-tile corridor forces raiders into single file so every spike trap triggers on a fresh target and your archers only ever face one enemy at the embrasure. Wider corridors let raiders spread out, bypass traps, and swamp your firing line. Keep the corridor 8–15 tiles long so enemies spend several seconds under fire crossing it.
Do spike traps need to be re-armed in Going Medieval?
Yes. A spike trap triggers on the enemy that steps on it and then must be re-armed by a settler before it can trigger again. During long raids some traps will fire early and sit inert, which is why deep corridors stack multiple trap rows — later raiders still hit armed traps further down the channel. After each raid, check the corridor and queue re-arms before the next attack.
What is a bait door and why does my killbox need one?
A bait door is a door left accessible (not forbidden) at the inner end of your killbox corridor. Raiders path toward the easiest reachable target inside your base; if the only open path runs through your trap corridor, they commit to it instead of attacking your walls. If every entrance is sealed, raiders switch to breaking down the nearest wall segment and your killbox never sees them.
Which weapon is best for killbox archers in Going Medieval?
For raw sustained damage, the Longbow leads at roughly 4.07 DPS (22 damage every 5.4 seconds) and shreds unarmoured raiders. For armoured targets, the Heavy Crossbow at Good quality hits for 36 with 92% armour penetration and 25m range — fewer shots, but each one lands at near-full power through plate. The strongest killboxes mix both: Longbow marksmen thin the wave, Heavy Crossbow marksmen delete the armoured survivors.
Why do raiders ignore my killbox and attack my walls?
Three common causes: (1) every door is forbidden or blocked, so the corridor isn't a valid path — un-forbid the bait door; (2) the corridor route is longer or more obstructed than simply smashing a wall — widen the funnel approach and clear debris; (3) the raid is a special event type that behaves differently. Watch the pathing when a raid spawns and adjust your funnel walls to catch the most common approach angles.
Related Guides
- Raid Defense Strategy — layered defences for every raid type
- Archer vs Crossbow — the weapon data behind your firing line
- Trap Placement — where traps earn their keep
- Double Wall vs Single Wall — perimeter hitpoint math
- Best Defense Layout — whole-base defensive planning
- Wealth Scaling & Raids — why your killbox must keep growing
Last updated: July 19, 2026. Weapon stats reflect in-game values (Going Medieval 0.22+); trap and pathing mechanics are described qualitatively. Game mechanics may change with future updates.