Going Medieval Double Wall vs Single Wall: The Hitpoint Math
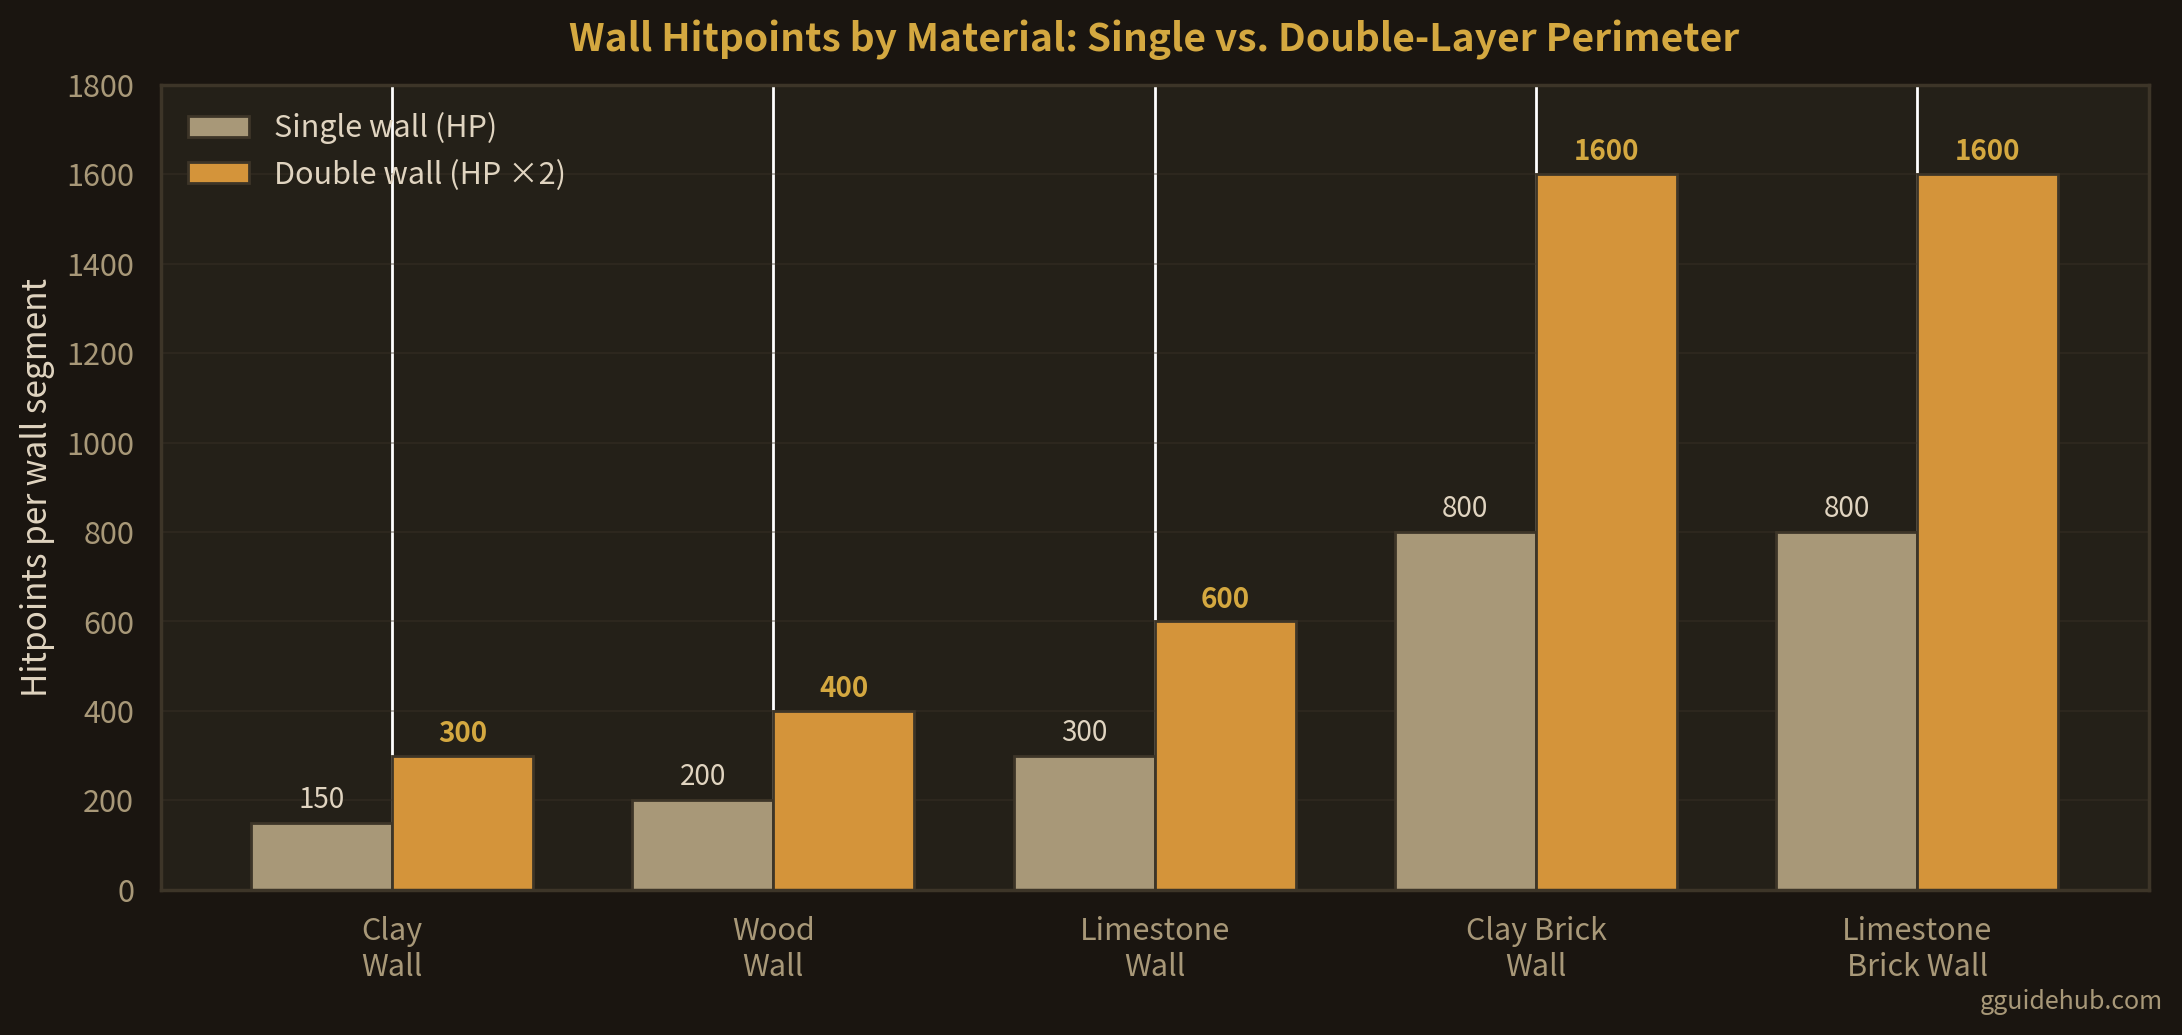
Every Going Medieval colony eventually asks the same question: is it better to build one thick perimeter or two thin ones? The answer lives in the hitpoint table. Walls are the only thing standing between raiders and your granary, and each material tier multiplies the punishment a wall segment can absorb — from a clay wall's modest 150 hitpoints to a brick wall's formidable 800. Doubling a wall doubles its effective hitpoints but also its cost and footprint, so the real decision is where doubling beats upgrading, and where it's wasted labour. This guide runs the numbers.
Wall Materials: Hitpoints, Cost, and Insulation
Every wall segment in Going Medieval costs 5 units of its material — the tiers differ in hitpoints, thermal insulation, and how much processing the material needs first. Clay is the weakest structural material but insulates best; wood is the year-one workhorse; raw limestone triples clay's durability straight out of the ground; and processed bricks are the endgame standard at 800 hitpoints per segment.
| Wall Type | Hitpoints | Cost per Segment | Thermal Insulation | Processing Needed | Role |
|---|---|---|---|---|---|
| Clay Wall | 150 | 5 Clay | 0.90 | Dig clay | Interior walls, insulation-first rooms |
| Wood Wall | 200 | 5 Wood | 0.80 | Chop trees | Year-one perimeter, fast expansion |
| Limestone Wall | 300 | 5 Limestone | 0.87 | Mine limestone | Mid-game perimeter upgrade |
| Clay Brick Wall | 800 | 5 Clay Bricks | 0.85 | Fire clay into bricks | Fortifications, gatehouse, keep |
| Limestone Brick Wall | 800 | 5 Limestone Bricks | 0.85 | Cut at stonemason's bench | Fortifications, gatehouse, keep |
Insulation Note: Thermal insulation matters for living spaces, not fortifications. Clay's 0.90 insulation makes it the best choice for bedroom and workshop walls where temperature control saves fuel and prevents mood penalties — see our temperature management guide. For the outer perimeter, hitpoints are the only stat that counts.
Single vs Double: When Each Wins
Doubling a wall means building a second parallel row with (ideally) a one-tile gap between. Raiders must demolish both rows to get through, so effective hitpoints double — but so do material and labour costs, and you lose the tiles between the walls. Compare that against simply upgrading one wall to a better material, and a clear ordering emerges.
| Configuration | Effective HP | Material per 2 Segments of Frontage | Footprint | Verdict |
|---|---|---|---|---|
| Single wood wall | 200 | 10 wood | 1 tile | Year one only — raiders chew through fast |
| Double wood wall | 400 | 20 wood | 3 tiles | Trap: upgrading to limestone beats it for less |
| Single limestone wall | 300 | 10 limestone | 1 tile | Solid mid-game default |
| Double limestone wall | 600 | 20 limestone | 3 tiles | Strong, but brick still wins per tile |
| Single brick wall | 800 | 10 bricks (plus processing) | 1 tile | Best HP per tile and per raw material |
| Double brick wall | 1600 | 20 bricks (plus processing) | 3 tiles | Endgame gatehouse and keep armour |
Cross-Section: What a Raider Must Break
Side view of the three perimeter tiers. Demolition damage applies to one segment at a time, so each additional row is a separate hitpoint pool the raider must empty — while your archers shoot the whole time from behind the inner line.
The Upgrade Order That Actually Works
The math above produces a simple rule: upgrade material before adding rows. A single brick wall (800 HP) outlasts a doubled limestone wall (600 HP) on one tile of frontage, using half the raw stone. Double walls only become efficient in two situations: when your outer ring is already brick and you want a second pool of hitpoints anyway, and when you want the gap itself — a one-tile buffer between rows keeps fire from spreading wall-to-wall and gives sappers a longer, trap-fillable route.
A practical progression by colony stage:
- Year 1: Single wood perimeter (200 HP) with a trap corridor at the one entrance. Wood is free and fast; spend saved labour on food and traps.
- Year 2: Replace the perimeter with single limestone (300 HP) as mining comes online. Double only the gatehouse and the wall segments flanking your killbox entrance — the tiles raiders actually attack.
- Year 3+: Rebuild the entrance ring, keep, and granary in brick (800 HP). Now consider a true double wall around the core: two brick rows (1600 HP effective) with the gap filled with spike traps is functionally a second killbox.
Don't double everything. A doubled perimeter around your entire base triples the build labour of an already expensive project, and most of those segments will never be attacked — raiders path to your bait entrance, not to a random stretch of rear wall backed by a hillside. Invest the surplus in merlons, a second archer tower, or the wall upgrade path instead. For whole-base placement, see best defense layout and corner tower design.
Repair Discipline: Damaged walls keep their remaining hitpoints but do not regenerate. After every raid, check segments that took demolition damage and queue repairs — a brick wall at 200 of 800 HP is now weaker than a fresh limestone wall. Repairs cost no new materials, only labour, so there is no excuse for a crumbling gatehouse.
Frequently Asked Questions
Is a double wall worth it in Going Medieval?
Yes in the mid-to-late game, no in week one. Doubling a wall literally doubles the hitpoints raiders must chew through — two limestone walls absorb 600 HP of demolition instead of 300. But doubling also doubles material and labour, and early raids are stopped more cheaply by a single wall plus spike traps and archers. Double the wall segments that face your killbox entrance and known approach angles first; single walls are fine behind natural barriers.
Which wall material has the most hitpoints in Going Medieval?
Brick walls. Both Clay Brick and Limestone Brick walls have 800 hitpoints per segment — four times a wood wall (200 HP) and over five times a clay wall (150 HP). Raw limestone walls sit in the middle at 300 HP. Brick requires a production chain, so most colonies run wood or raw limestone first and upgrade to brick for the keep and gatehouse.
How much does each wall type cost in Going Medieval?
Every wall segment costs 5 units of its material: 5 wood for a wood wall, 5 clay for a clay wall, 5 limestone for a limestone wall, and 5 clay bricks or 5 limestone bricks for a brick wall. The true cost difference is processing — bricks must be crafted from raw clay or limestone first, so a brick wall carries the labour of brick production on top of the wall-building job itself.
Should I upgrade to brick or build a second stone wall?
Upgrade to brick first. A single limestone brick wall (800 HP) beats a double raw-limestone wall (600 HP total) while consuming half the footprint and fewer total materials (5 bricks vs 10 limestone per doubled segment). Double walls become the answer only after your outer ring is already brick, or where you want an air gap as a fire and sapper buffer around critical structures.
Related Guides
- Wall Upgrade Guide — the full material progression
- Wall & Floor Material Upgrades — when to rebuild vs repair
- Building Material Tiers — every construction material ranked
- Killbox Design — make raiders never reach your walls
- Best Defense Layout — whole-base fortification planning
- Structural Mechanics — how walls, floors, and roofs interact
Last updated: July 19, 2026. Wall hitpoints span clay 150, wood 200, limestone 300, and brick 800, at 5 material per segment. Game mechanics may change with future updates.