Going Medieval Building Material Tiers: Every Material Ranked
Going Medieval gives you five wall materials and a handful of floor materials, and the differences between them are not cosmetic — they are the difference between a gatehouse that holds and one that folds, between a cellar at 2°C and one at 6°C, between bedrooms that keep settlers comfortable through a heat wave and ones that cook them. Each tier trades three things: hitpoints, thermal insulation, and the labour it takes to produce the material in the first place. This guide lays out the real numbers for every tier, then tells you which material belongs where.
Wall Tiers: Hitpoints, Insulation, and Cost
Every wall segment costs 5 units of its material, so raw cost is identical across tiers — what changes is how you get the material and what the finished wall can take. Clay is the weakest wall in the game at 150 hitpoints but the best insulator. Wood is the year-one workhorse. Raw limestone triples clay's durability straight out of the mine. And both brick types top out at 800 hitpoints — but only after a production chain turns raw clay or limestone into bricks first.
| Wall Material | Hitpoints | Thermal Insulation | Cost per Segment | Production Chain | Best Use |
|---|---|---|---|---|---|
| Clay Wall | 150 | 0.90 | 5 Clay | Dig a clay deposit | Bedroom, cellar, and workshop interiors |
| Wood Wall | 200 | 0.80 | 5 Wood | Chop trees | Year-one perimeter, scaffolding, fast expansion |
| Limestone Wall | 300 | 0.87 | 5 Limestone | Mine a limestone deposit | Mid-game perimeter and outer buildings |
| Clay Brick Wall | 800 | 0.85 | 5 Clay Bricks | Fire clay in a kiln | Keep, gatehouse, granary armour |
| Limestone Brick Wall | 800 | 0.85 | 5 Limestone Bricks | Cut at a stonemason's bench | Keep, gatehouse, granary armour |
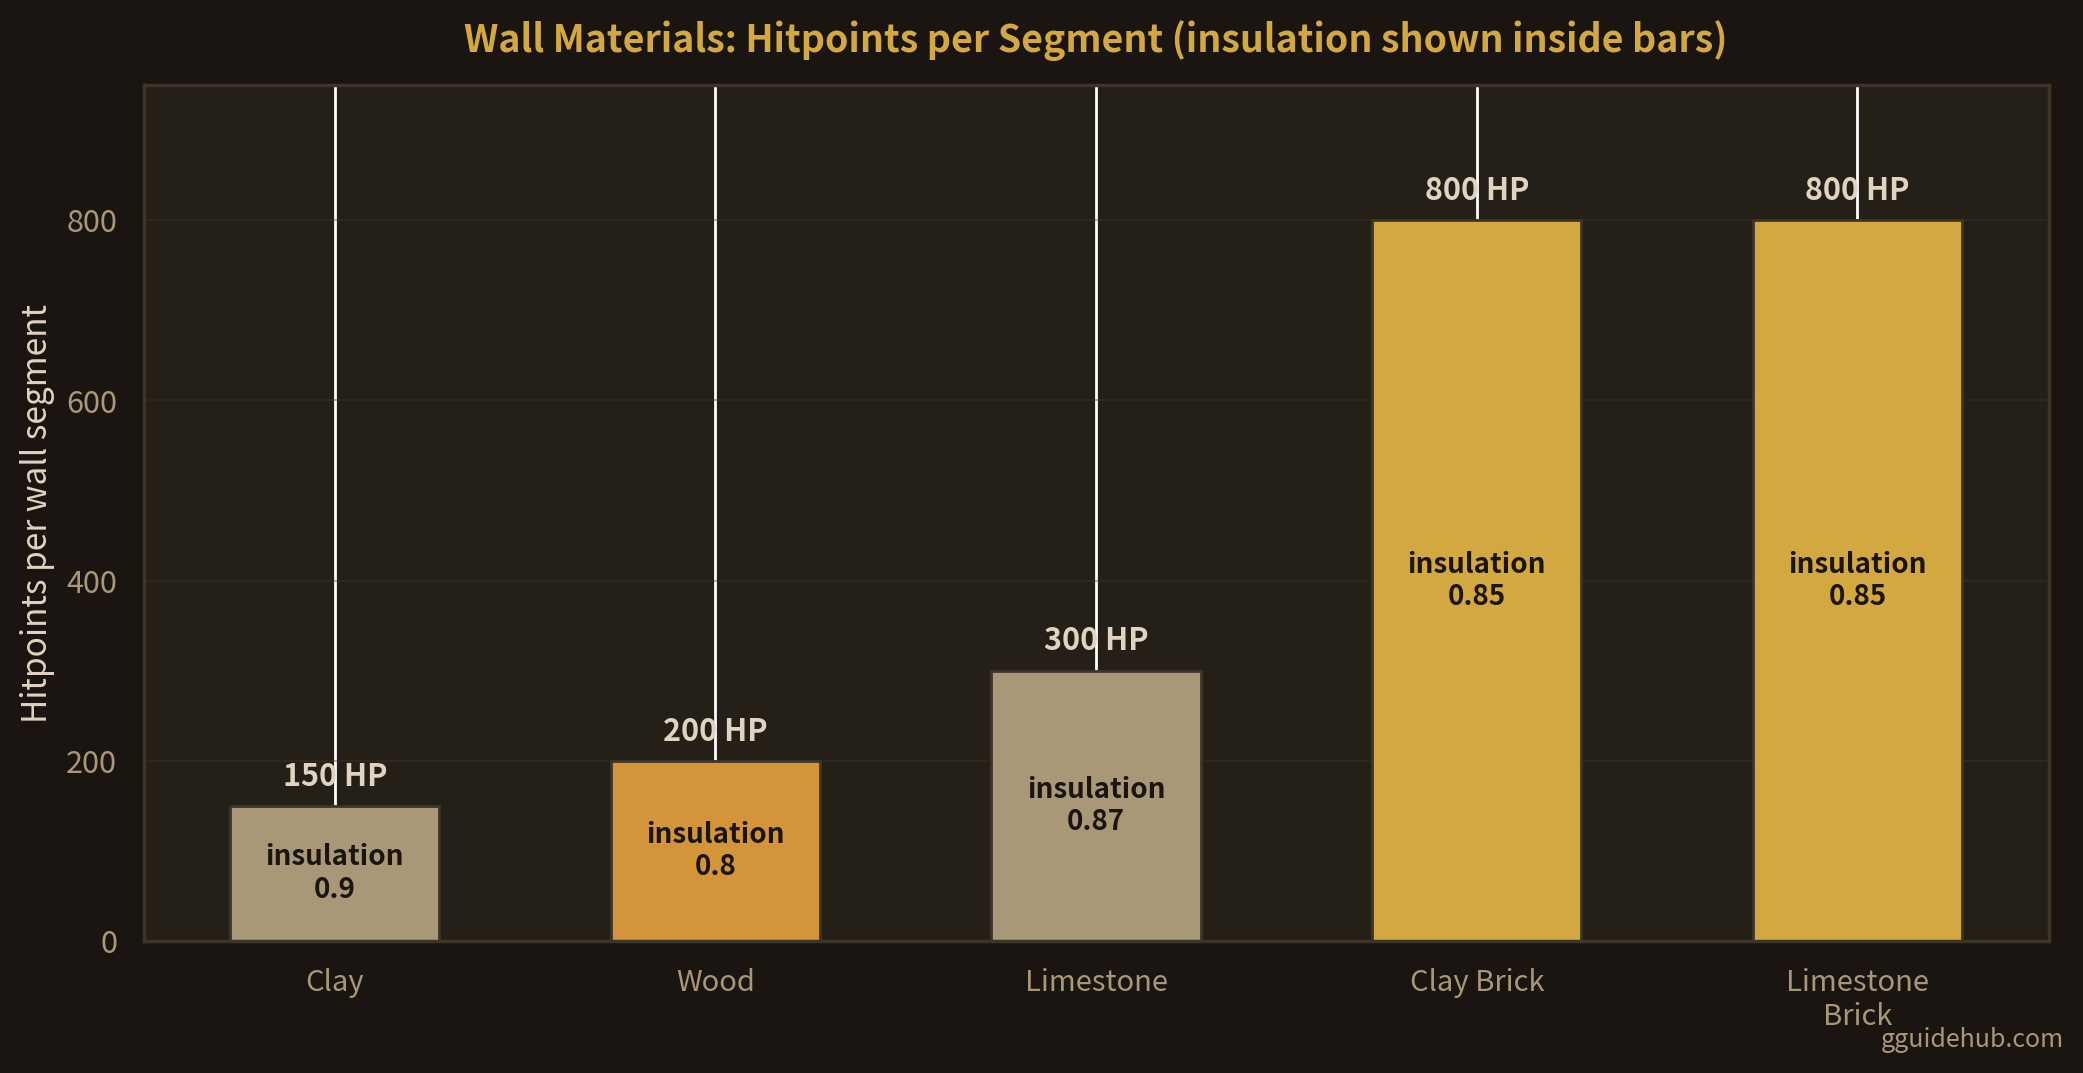
The two brick tiers are statistically identical — 800 hitpoints, 0.85 insulation, 5 bricks per segment — so choose by geography, not stats. Clay deposits give you clay bricks via the kiln; limestone mountains give you limestone bricks via the stonemason's bench. Most maps favour one chain heavily, and doubling up on the wrong one wastes a workstation. For how these walls stack up when raiders actually start swinging, see double wall vs single wall and the wall upgrade guide.
Floor Tiers: Insulation Is the Whole Game
Floors do not take demolition damage the way walls do, so their tiers are about temperature and comfort rather than hitpoints. Flooring acts as insulation — a floored cellar holds the cold better than bare ground, and a floored bedroom loses less heat in winter. The values below come from the same community cold storage testing used in our winter food storage guide.
| Floor Material | Thermal Insulation | Role |
|---|---|---|
| Wicker grated floor | 0.05 | Decorative / airflow; no meaningful insulation |
| Wood flooring | 0.75 | Cheap insulated floor for living and storage rooms |
| Limestone / clay tile floor | 0.80 | Best floor insulation; the finished-interior standard |
| Dirt (natural, unbuilt) | 0.95 listed | Highest listed value, but testing shows built walls and floors outperform raw dirt in practice |
The dirt trap: natural dirt lists a 0.95 insulation value — higher than any built material — yet rooms surrounded by built clay walls run about 2°C colder than the same room left as raw dirt. Trust the thermometer, not the tooltip: build your walls and floors, even underground.
The Right Tier for Each Colony Stage
Because every wall costs the same 5 units, your material choice is really a labour choice. Chopping wood is instant; mining limestone takes a pickaxe and a shaft; bricks take a mine plus a kiln or stonemason's bench plus a hauling chain. Sequence your upgrades so each tier pays for the next:
| Colony Stage | Perimeter | Interiors | Why |
|---|---|---|---|
| Year 1 | Wood (200 HP) | Wood / clay as found | Speed is everything; spend labour on food, not masonry |
| Year 2 | Limestone (300 HP) | Clay (0.90 insulation) | Mining comes online; clay interiors fix winter comfort |
| Year 3+ | Brick at the entrance ring (800 HP) | Clay + tile floors (0.80) | Brick production chain feeds fortifications first |
| Endgame | Double brick around the core | Fully floored and decorated | Surplus brick armours the keep; comfort work follows |
Two placement rules fall out of the numbers. First, insulation materials go inside, hitpoint materials go outside — clay's 150 HP makes it a liability on any wall a raider can reach, while brick's mediocre 0.85 insulation is wasted on a bedroom. Second, temperature-critical rooms earn their walls first: the food cellar, the bedrooms, and the workshop. A cold cellar built from clay with a wood floor holds roughly 2–4°C, which is the difference between your harvest lasting winter and rotting in November — the numbers are in our food preservation guide.
Don't forget the structures between the walls. Stability is simulated: wide dug-out rooms cave in without support posts and beams, and roofs need walls or beams close enough to bear them. The material you choose for those supports follows the same tier logic — wood early, stone where fire or raiders are a threat. See structural mechanics for the support rules, and temperature management for putting insulation to work room by room.
Frequently Asked Questions
What is the best building material in Going Medieval?
Brick — either clay brick or limestone brick — is the strongest material at 800 hitpoints per wall segment, four times a wood wall (200 HP) and over five times a clay wall (150 HP). But "best" depends on the job: clay has the highest thermal insulation of any wall (0.90), making it the best choice for bedrooms and cold storage, while wood is the fastest and cheapest to raise in year one. Use brick for fortifications, clay for temperature-critical interiors.
Which material insulates best in Going Medieval?
Clay walls have the highest thermal insulation of any buildable wall at 0.90, ahead of limestone (0.87), brick (0.85), and wood (0.80). For floors, limestone and clay tile floors insulate at 0.8, wood flooring at 0.75, and wicker grated floors at just 0.05. Community cold storage testing found built clay walls outperform even bare dirt (listed at 0.95) in practice, keeping a finished cellar around 2–4°C.
How much do walls cost in Going Medieval?
Every wall segment costs 5 units of its material: 5 wood, 5 clay, 5 limestone, 5 clay bricks, or 5 limestone bricks. The hidden cost is processing — clay bricks must be fired in a kiln and limestone bricks cut at a stonemason's bench, so a brick wall carries the labour of the whole brick production chain on top of the construction job itself.
Is clay or wood better for a first base in Going Medieval?
Wood for the perimeter, clay for the rooms. Wood walls (200 HP) are tougher than clay (150 HP) and trees are everywhere, so your first defensive ring should be wood. But clay's 0.90 insulation beats wood's 0.80, and clay is dug rather than chopped, so interior walls of bedrooms, workshops, and especially food cellars should be clay as soon as you find a deposit.
When should I upgrade from wood to stone or brick in Going Medieval?
Upgrade the perimeter to raw limestone (300 HP) in year two once mining is running, and rebuild the entrance ring, gatehouse, and keep in brick (800 HP) from year three onward. A single brick wall outlasts even a doubled limestone wall (600 HP effective) on one tile of frontage. Do not rebuild everything at once — prioritize the wall segments raiders actually attack, plus the granary and any structure whose loss would end the colony.
Related Guides
- Double Wall vs Single Wall — the hitpoint math for fortifications
- Winter Food Storage — insulation materials in the cold cellar
- Food Preservation Guide — where insulation values pay off
- Wall Upgrade Guide — sequencing the material progression
- Wall & Floor Material Upgrades — when to rebuild vs repair
- Floor Material Guide — room-by-room flooring choices
- Structural Mechanics — stability, supports, and cave-ins
- Temperature Management — putting insulation to work
Last updated: July 19, 2026. Wall hitpoints span clay 150, wood 200, limestone 300, and brick 800, at 5 material per segment. Game mechanics may change with future updates.