Going Medieval Raid Defense Strategy: Survive Every Raid Type
Raids are the pressure test of every Going Medieval colony. They arrive as events recorded in your Historical Records, scale with your wealth and population, and escalate from a handful of club-wielding bandits into armoured companies that can level an unprepared settlement. The colonies that survive aren't the ones with the most fighters — they're the ones with the best layers: a perimeter that channels attackers, traps that bleed them, elevated archers behind merlons that kill them, and a melee reserve that finishes whatever crawls through. This guide covers every raid type, the defensive layer stack, and the weapon math for each threat level.
Raid Types and How to Answer Them
Going Medieval generates several distinct raid events. Standard raids are direct assaults by hostile factions; new-settler raids arrive when a refugee joins and their pursuers follow; animal raids are swarms of ferocious wildlife rather than humans. Each demands a slightly different response — the table below summarises what to expect and the counter that works.
| Raid Event | Category | What Happens | Best Counter |
|---|---|---|---|
| Mindless Assassins | Standard raid | Hostile faction squad assaults your settlement directly | Full layer stack: traps, embrasures, focused fire |
| Third Coming Attack | Standard raid | Religious-faction assault; often larger than bandit raids | Deep trap corridor; crossbows for armoured zealots |
| Progeny Attack | Standard raid | Progeny faction war party targets your colony | Elevated firing positions; melee blocker at chokepoint |
| Violent Extortionists (Salvation, Barbarian Snack, Jailbird, Lost Property) | New settler raid | A refugee joins; their armed pursuers arrive demanding them back | Vet refugees before accepting; standard killbox handles the follow-up |
| Ferocious Swarm | Animal raid | A pack of hostile animals (e.g. wolves) attacks settlers on sight | Everyone indoors; archers shoot over walls — animals can't open doors |
Alignment Matters: Whether a faction raids you or trades with you depends on alignment. Hostile factions send raids; friendly and neutral factions send merchants. Check your faction standings before assuming every visitor is a threat — and before accidentally starting a war by attacking a neutral caravan.
The Layered Defense Stack
No single structure stops a raid — survival comes from stacking layers that each remove part of the threat before the next one engages. A raid that reaches your inner door should already be half-dead. Build outward in this order as your colony grows.
| Layer | Structure | Job | Priority |
|---|---|---|---|
| 1 — Perimeter | Wood wall (200 HP) → limestone (300 HP) → brick (800 HP) | Deny free entry; force raiders toward your chosen entrance | Day 1–3 |
| 2 — Channel | Single entrance + funnel walls | Concentrate the raid into one predictable approach | Week 1 |
| 3 — Attrition | Wooden spike traps in a 1–2 tile corridor | Strip health from every attacker before contact; re-arm after each raid | Week 1–2 |
| 4 — Fire | Archers behind embrasures / merlons, ideally elevated | Kill channelled raiders from safety; elevation buffs precision, range, crit chance | Ongoing |
| 5 — Anvil | Armoured melee settler with shield at the inner chokepoint | Pin wounded survivors in place for the firing line | Year 2+ |
| 6 — Redoubt | Lockable inner keep with food and wounded-settler beds | Survive a breach; non-combatants retreat here when the horn sounds | Year 2+ |
The redoubt layer is the one most colonies forget. Draft control lets you order any settler anywhere — and that includes ordering your cook, tailor, and researcher away from the fighting. When a raid spawns, pause, draft non-combatants into the inner keep, then assign fighters to their positions. Losing your only doctor to a stray arrow hurts more than any wall repair. For corridor-level detail, see our killbox design guide.
Weapon Math: Matching Firepower to Armour
Early raids are unarmoured, and any bow works. By the mid-game, raiders arrive in armour that blunts ordinary arrows — and weapon choice becomes the difference between a clean defence and a breach. The decisive stat is armour penetration: bows penetrate 80%, crossbows 90–92%. Against a heavily armoured target, that gap means a Longbow's 22 damage is mostly absorbed while a Heavy Crossbow's 36 lands almost intact.
| Weapon | Damage (Good) | Armour Pen. | Attack Duration | Range | Best Anti-Raid Use |
|---|---|---|---|---|---|
| Short Bow | 12 | 80% | 5.4s | 18m | Early raids; arming untrained settlers |
| Longbow | 22 | 80% | 5.4s | 18m | Unarmoured/mixed raids; highest sustained DPS (4.07) |
| Crossbow | 26 | 90% | 9.45s | 25m | Armoured raiders; engaging at max range |
| Heavy Crossbow | 36 | 92% | 10.35s | 25m | Plate-armoured elites and shield-bearers |
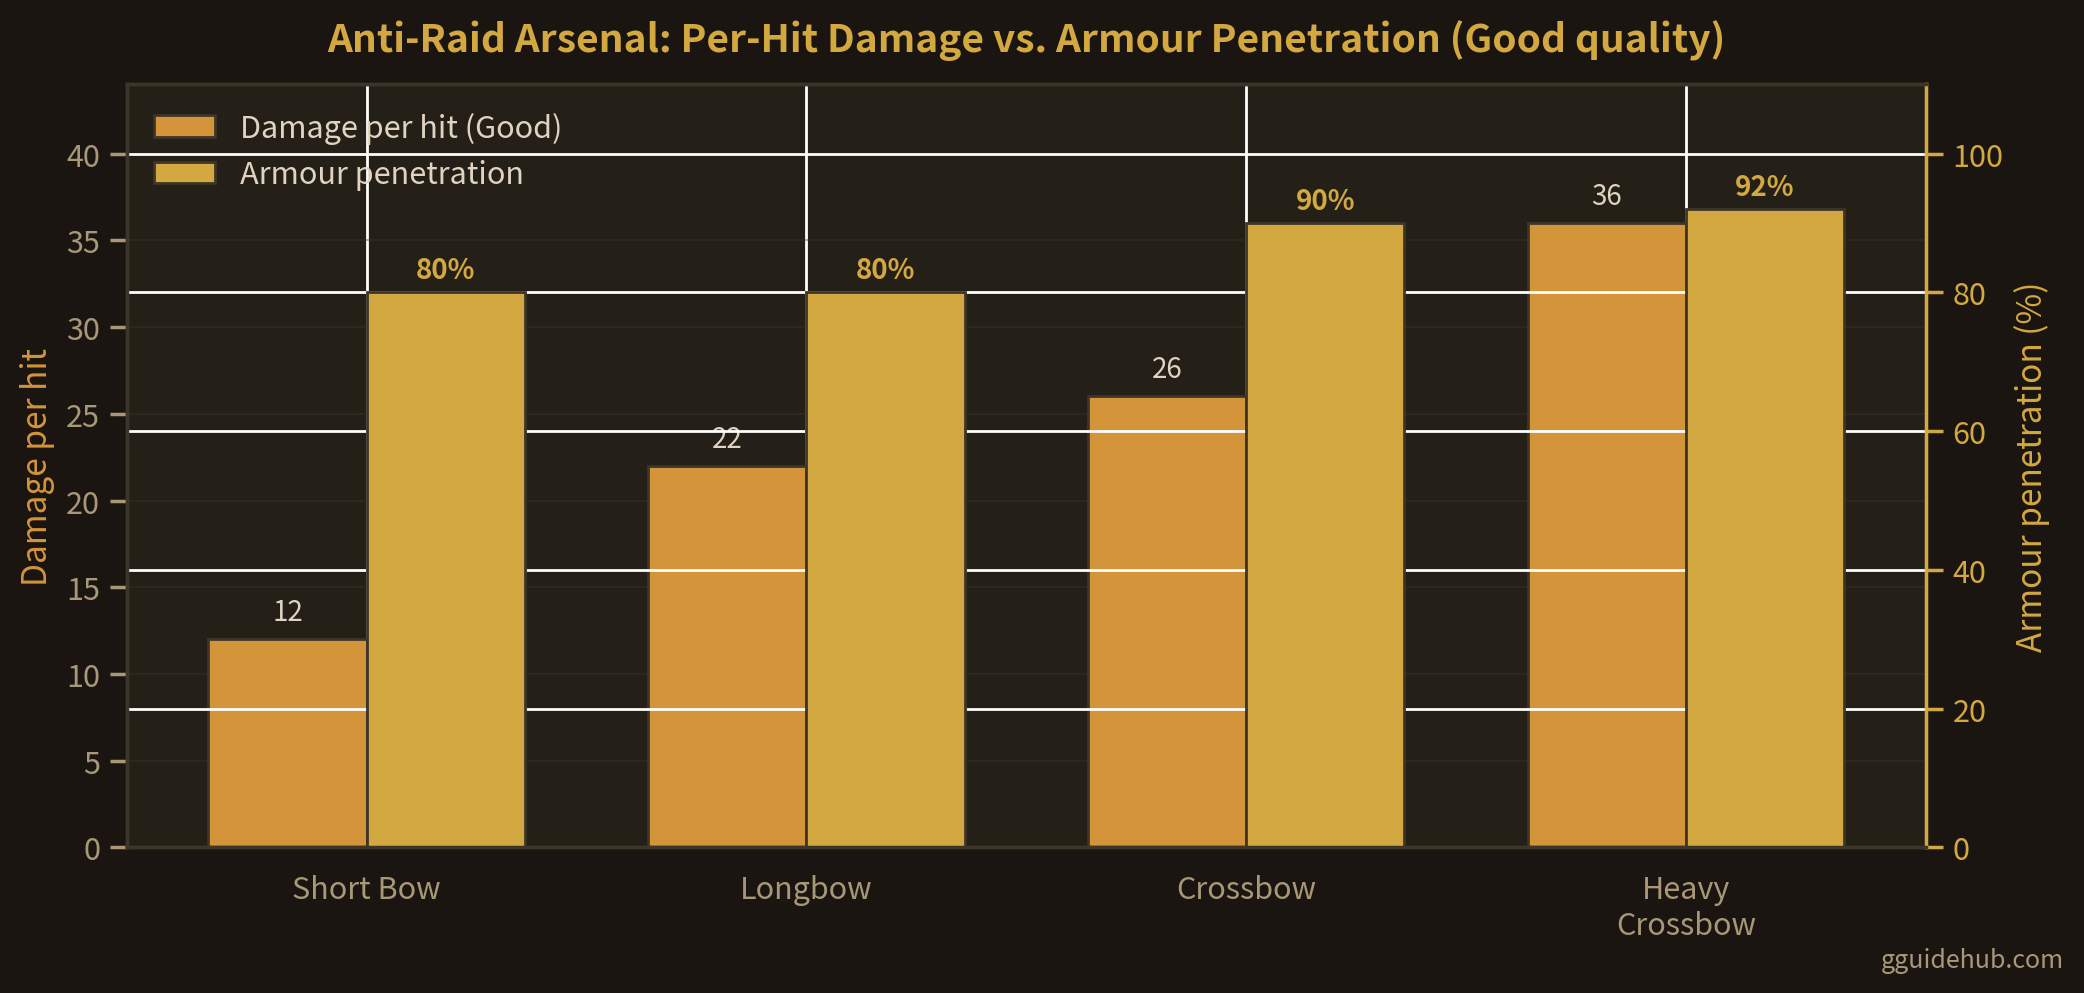
Raid composition tells you which weapon matters in any given fight. A raid of ragged bandits is a Longbow problem — fast shots, targets dropping to traps and arrows in seconds. A raid fronted by plate-armoured veterans is a Heavy Crossbow problem — designate one marksman per elite and focus-fire (select all archers, then right-click the priority target). Full weapon statistics, costs, and skill requirements are in our archer vs crossbow data sheet, and broader fortification options in the complete defense guide.
The Raid Rhythm: Before, During, After
Before: Wealth and population drive raid size, so manage both deliberately — our wealth scaling guide explains the relationship. Keep traps armed, embrasures repaired, and at least one bow per settler plus a crossbow per trained marksman. Watch the calendar and event log; raid timing patterns help you anticipate busy seasons.
During: Pause the moment the raid banner appears. Forbid side doors, un-forbid the bait entrance, draft combat settlers into position, and send everyone else to the redoubt. Archers auto-engage anything in range, so positioning is 90% of the battle — reserve manual orders for focus-firing armoured elites and pulling wounded settlers off the wall.
After: Undraft, treat the wounded (see wounded settler healing), re-arm every trap, repair damaged wall segments, and haul loot and corpses out of the corridor. Raider equipment — especially armour and weapons from elite attackers — is often your best source of quality gear in the mid-game; check what raids drop before smelting anything.
The One Rule: Never let a raid find your settlers scattered across the map doing chores. A raid that catches three settlers alone in the fields is three funerals; the same raid against a manned wall is target practice. The draft-and-position routine should be muscle memory by the end of year one.
Frequently Asked Questions
How do raids scale in Going Medieval?
Raid size and equipment scale with your settlement's wealth and population, and with the difficulty you chose at world creation. A poor year-one camp faces small bands of unarmoured attackers, while a rich, populous fortress draws large groups wearing plate armour and carrying quality weapons. Hoarding valuable items raises your wealth and therefore future raid size — spend or trade value before it attracts attention you can't handle.
What is the best defense against early raids in Going Medieval?
A wood perimeter wall with a single entrance, a short corridor of wooden spike traps, and every settler armed with a Short Bow (20 wood each, no skill requirement). Draft all settlers when the raid warning appears, position archers behind the wall near the entrance, and let the traps soften attackers. This setup costs only wood and works from the first week.
Do merlons and elevation actually help my archers?
Yes — both are confirmed in-game mechanics. Merlons provide cover that protects your archers from enemy projectiles, and placing archers on higher ground grants a buff to precision, range, and critical hit chance. An archer on a merlon-topped tower outshoots the same archer on open ground in both directions: they hit more often and get hit less.
How do I deal with armoured raiders in Going Medieval?
Use crossbows. Bows have 80% armour penetration, so heavily armoured raiders shrug off most of their damage. Crossbows and Heavy Crossbows penetrate 90% and 92% respectively — a Good-quality Heavy Crossbow hits for 36 damage at near-full effect through plate. Focus-fire armoured targets with crossbow marksmen while Longbow archers handle unarmoured stragglers, and let spike traps strip health from everyone first.
Should I fight raids in the open or behind walls?
Behind walls, almost always. Raiders outnumber your military settlers in most mid- and late-game raids, and open-field melee trades your trained fighters against disposable attackers. Walls, traps, merlons, and elevation multiply each settler's effectiveness several times over. The only good reason to sally out is to intercept a raid your defences genuinely can't contain — and even then, fight at the chokepoint, not in the field.
Related Guides
- Killbox Design — build the corridor that wins fights for you
- Wealth Scaling & Raids — manage the raid size curve
- Archer vs Crossbow — full weapon data sheet
- Raid Loot Table — what attackers drop
- Best Weapons for Defense — arming your garrison
- Double Wall vs Single Wall — perimeter hitpoint math
Last updated: July 19, 2026. Defence mechanics (merlon cover, elevation buffs, alignment) and weapon stats reflect in-game values (0.22+). Raid size scaling is described qualitatively. Game mechanics may change with future updates.