Going Medieval Stockpile Optimization
Hauling is the invisible tax on every colony in Going Medieval. A settler who walks thirty tiles to fetch clay, thirty back to a stockpile, and twenty more to the kiln has spent most of the job walking — and the default 6×6 "everything pile" from the tutorial guarantees that outcome at scale. The fix is three mechanics the game gives you but never explains together: stockpile priority (which silently reshuffles goods between storage), shelves and racks (which triple your storage density), and decay control (roofs, floors, and cold cellars). This guide uses the exact shelf and rack capacities plus measured cold storage temperatures to build a storage network that runs itself.
Shelves and Racks: Exact Capacities
Update #1 (Shelves & Racks, version 0.5.31.8) added purpose-built storage furniture, and the patch notes state exact pile counts for every piece. A ground stockpile tile holds one pile per tile; every entry below beats that density — and settlers prefer pulling production inputs from shelves, which makes a shelf next to a workstation a self-feeding buffer.
| Storage Furniture | Capacity | Holds | Research Required |
|---|---|---|---|
| Shelf | 3 piles | Food, textiles, medicine | Preserving Food |
| Bookshelf | 4 piles | Books (Chronicles, Textbooks, Theses) | Furniture |
| Wall Bookshelf | 3 piles | Books; attaches to a wall | Furniture |
| Weapon Rack | 3 weapons / shields | Weapons and shields | Furniture |
| Armour Rack | 1 head + 1 body item | Armour and apparel | Furniture II |
| Chest | 2 items | Clothing, hats, armour, weapons | Furniture II |
| Ground stockpile tile | 1 pile | Anything you allow in its settings | None (Zone menu, F7) |
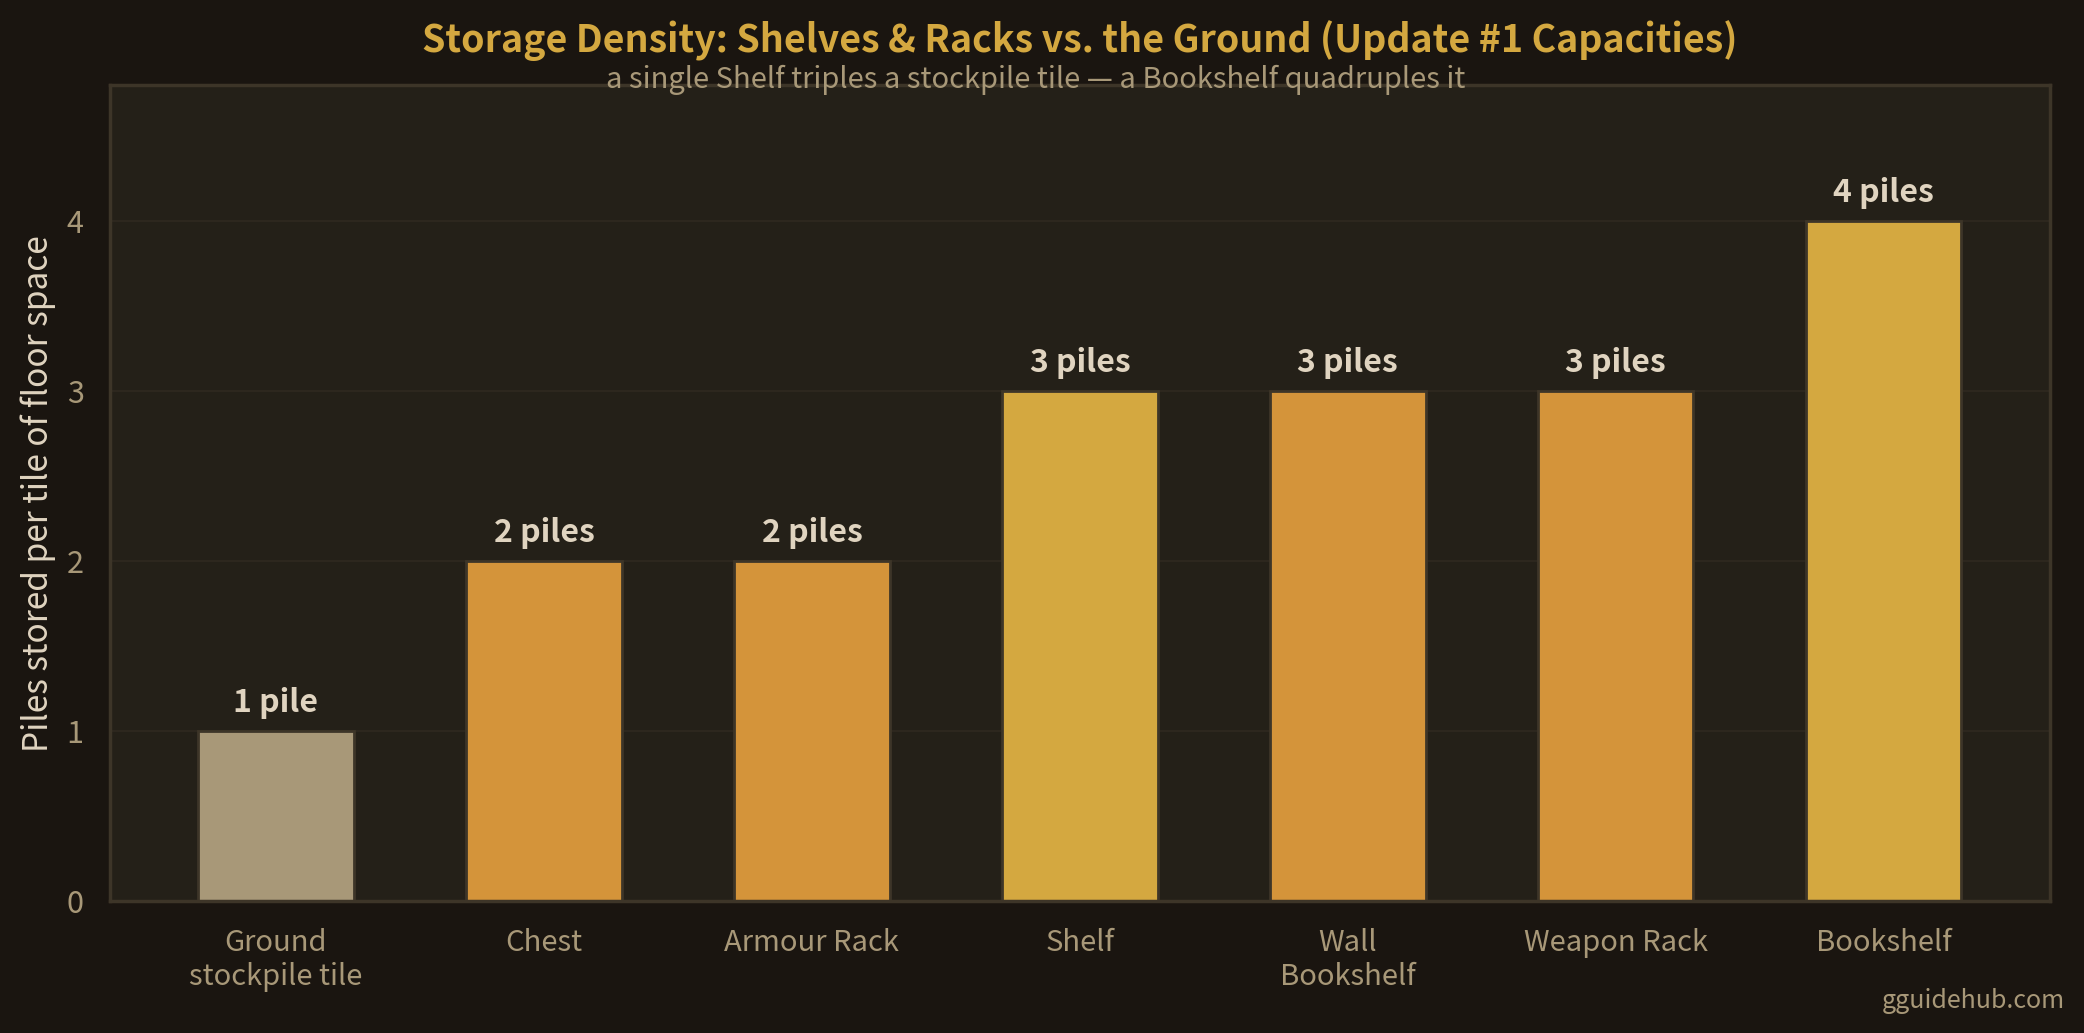
Two quality-of-life mechanics shipped in the same update and belong in every storage plan. First, copy/paste settings: copying a stockpile now copies its filter settings too, and you can paste settings onto shelves and racks — anything the target cannot hold is automatically dismissed, so a meat filter pasted onto a bookshelf simply drops the meat. Second, the priority drop-down on every stockpile, shelf, and rack — which deserves its own section, because it changes hauling behaviour colony-wide.
Stockpile Priority: The Silent Conveyor Belt
The priority rules are precise: settlers always haul to the highest-priority valid stockpile first, and — this is the part most players miss — they will move resources from lower-priority storage to higher-priority storage on their own, including onto shelves and racks. Set a weapon rack to very high priority and your haulers will keep it perpetually stacked. Priority picks thedestination; it does not reorder the hauling job itself.
That auto-transfer behaviour lets you build a two-tier storage network with zero micromanagement: big, low-priority bulk yards near the resource sources, and small, high-priority buffer shelves beside the workshops. Settlers top up the buffers from the yards as part of normal hauling, so your cook, smith, and tailor almost never leave their stations:
| Tier | Priority Setting | Location | What It Holds |
|---|---|---|---|
| Bulk yard | Low / Normal | Next to the source — treeline, quarry face, fields | Raw logs, limestone, clay, harvested crops in volume |
| Workshop buffer | High / Very High | Shelf or 2–4 tile stockpile a few steps from the workstation | Only that station's inputs — a kiln shelf gets clay, nothing else |
| Finished goods | Normal | Beside the producing workshop or near the trading spot | Bricks, planks, meals, armour — ready to build with or sell |
| Cold cellar | High | One level underground, clay-walled | Fresh food only; see the decay table below |
Two gotchas. One: settlers will not move an item off a stockpile unless a second stockpile accepts that category — if bones keep landing in your food pile, the fix is a corpse-and-bones yard, not more filtering on the food pile. Two: leave a one-tile gap between walls and stockpiles; piles flush against walls cause pathfinding problems for settlers working around them.
Decay: What Each Storage Type Actually Buys You
Everything on a stockpile is racing a decay timer, and the timer runs at different speeds depending on where the pile sits. The in-game tutorial itself tells you to place stockpiles under roofs or inside to slow decay; measured cellar temperatures anchor the underground end of the spectrum:
| Storage Situation | Decay Protection | Best For |
|---|---|---|
| Bare ground, open sky | None — full decay speed | Stone, ore, and other materials you barely care about |
| Floor under the pile | Slows decay versus bare ground | Day-one stockpiles; build the floor first, then zone the pile (avoids a relocating-piles bug) |
| Roofed or indoors | Slows decay further (official tutorial advice) | Textiles, weapons, tools, furniture |
| Underground, 1 level dirt overhead | 5.8°C measured — cold slows food decay | The day-one larder; better than any surface room |
| Finished cold cellar (clay walls, wood floor, large room) | 2.2°C measured; ~2°C held during a 32°C summer | The colony's fresh-food reserve |
| Pickled vegetables (salt + stove) | Needs no cold storage at all | Overflow harvests; cellar-space relief |
The full construction walkthrough — wall insulation values, room size, and support spans — lives in our winter food storage guide, and the preservation pipeline is in the food preservation guide. The stockpile-side lesson is simply: perishables earn the expensive real estate. A limestone block can sit in the rain all year; a cabbage cannot.
An Efficient Storage Layout, Top-Down
The pattern that falls out of the mechanics: bulk yards sit against the map's resource edges, the workshop block occupies the centre with a buffer shelf per station, and the food chain runs downward into a cold cellar. Every arrow below is a hauling trip that the priority system handles automatically once the tiers are set.
Running the Network Day to Day
Three habits keep the system clean. Filter aggressively: a stockpile that accepts everything attracts everything, including the bones and carcasses that belong in the downwind yard — and remember settlers need a valid second destination before they will relocate anything. Un-forbid your starting supplies: the scenario spawn goods are forbidden by default (the hand-and-X icon), and settlers will ignore them until you allow each pile — double-click selects every pile of that type at once. And build floors before stockpiles: laying floor under an existing pile can trigger the relocating-piles bug where settlers loop loading and unloading; floor first, zone second.
Scale the network with the job system, not with more piles. One settler on high-priority hauling keeps a two-tier network topped up for a mid-size colony; if buffers run dry while the yards are full, the answer is another hauler or a shorter yard-to-workshop distance, not a bigger buffer. Pair this layout with the work priorities guide and the workshop layout guide — the +20% Workshop room bonus matters far more when the crafter never leaves the room.
Frequently Asked Questions
How does stockpile priority work in Going Medieval?
Every stockpile, shelf, and rack has a priority drop-down added in the Shelves & Racks update. Settlers always haul to the highest-priority valid stockpile first, and they actively move resources from lower-priority storage to higher-priority storage — including onto shelves and racks. A rack set to very high priority stays perpetually stacked. Priority chooses the destination, not the hauling job's urgency.
Do items decay on stockpiles in Going Medieval?
Yes. Resources on bare ground outdoors decay, and the official tutorial advises roofing stockpiles or moving them inside to slow decay; a floor under the pile helps too. Food is temperature-driven: an underground cellar measured at 2.2°C preserves food far longer than any surface room, while pickled vegetables need no cold storage at all.
Are shelves better than stockpiles in Going Medieval?
For dense storage, yes — a shelf holds 3 piles of food, textiles, or medicine on one tile, triple a ground tile's density. Shelves come from Preserving Food research; bookshelves (4 piles) and weapon racks (3 weapons) from Furniture; armour racks and chests from Furniture II. Settlers also prioritize shelf goods for production, so a shelf beside a workstation acts as a self-feeding buffer.
Why won't my settlers move items off a stockpile in Going Medieval?
Usually because no other stockpile accepts that item category — settlers will not relocate goods without a valid destination. Create a second stockpile that allows the item and the transfer happens on its own. Also check the item isn't forbidden (hand-and-X icon), which blocks hauling entirely.
Where should I place stockpiles in Going Medieval?
Adjacent to the workshops that consume the goods, with one tile of clearance from walls — piles flush against walls cause pathfinding problems. Keep bulk yards near their sources, a small high-priority buffer shelf within a few tiles of each workstation, and food storage one level underground where measured temperatures run 2–6°C.
Related Guides
- Winter Food Storage — cold cellar temperatures and winter food math
- Food Preservation Guide — smoking, pickling, and shelf-stable food
- Best Workshop Layout — the +20% room bonus your buffers feed
- Work Priorities Setup — staffing the hauling tier
- Production Chain Optimization — the full raw-to-finished pipeline
- Storage Guide — stockpile fundamentals and zoning basics
- Root Cellar — detailed cellar construction walkthrough
Last updated: July 19, 2026. Values may shift with game updates.